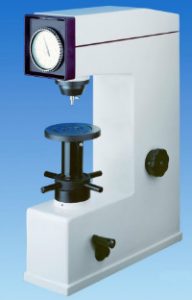
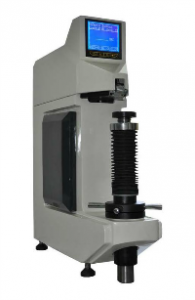
Rockwell Hardness Testing
Hardness is a characteristic of a material, not a fundamental physical property. It is defined as the resistance to indentation, and it is determined by measuring the permanent depth of the indentation. More simply put, when using a fixed force (load) and a given indenter, the smaller the indentation, the harder the material. Indentation hardness value is obtained by measuring the depth or the area of the indentation using one of over 12 different test methods. 
The Rockwell hardness test method, as defined in ASTM E-18, is the most commonly used hardness test method. You should obtain a copy of this standard, read and understand the standard completely before attempting a Rockwell test. The Rockwell test is generally easier to perform, and more accurate than other types of hardness testing methods. The Rockwell test method is used on all metals, except in condition where the test metal structure or surface conditions would introduce too much variations; where the indentations would be too large for the application; or where the sample size or sample shape prohibits its use.
The Rockwell method measures the permanent depth of indentation produced by a force/ load on an indenter. First, a preliminary test force (commonly referred to as preload or minor load) is applied to a sample using a diamond indenter. This load represents the zero or reference position that breaks through the surface to reduce the effects of surface finish. After the preload, an additional load, call the major load, is applied to reach the total required test load. This force is held for a predetermined amount of time (dwell time) to allow for elastic recovery. This major load is then released and the final position is measured against the position derived from the preload, the indentation depth variance between the preload value and major load value. This distance is converted to a hardness number.
Preliminary test loads (preloads) range from 3 kgf (used in the “Superficial” Rockwell scale) to 10 kgf (used in the “Regular” Rockwell scale) to 200 kgs (used as a macro scale and not part of ASTM E-18; see ASTM E-1842). Total test forces range from 15kgf to 150 kgf (superficial and regular) to 500 to 3000 kgf (macrohardness).
A variety of indenters may be used: conical diamond with a round tip for harder metals to ball indenters ranges with a diameter ranging from 1/16” to ½” for softer materials.
When selecting a Rockwell scale, a general guide is to select the scale that specifies the largest load and the smallest indenter possible without exceeding defined operation conditions and accounting for conditions that may influence the test result. These conditions include test specimens that are below the minimum thickness for the depth of indentation; a test impression that falls too close to the edge of the specimen or another impression; or testing on cylindrical specimens. Additionally, the test axis should be within 2-degress of perpendicular to ensure precise loading; there should be no deflection of the test sample or tester during the loading application from conditions such as dirt under the test specimen or on the elevating screw. It is important to keep the surface finish clean and decarburization from heat treatment should be removed.
Sheet metal can be too thin and too soft for testing on a particular Rockwell scale without exceeding minimum thickness requirements and potentially indenting the test anvil. In this case a diamond anvil can be used to provide a consistent influence of the result. Another special case in testing cold rolled sheet metal is that work hardening can create a gradient of hardness through the sample so any test is measuring the average of the hardness over the depth of indentation effect. In this case any Rockwell test result is going to be subject to doubt, there is often a history of testing using a particular scale on a particular material that operators are used to and able to functionally interpret.
Source by: AMETEK
