Pressure Terms & Definitions
GENERAL TERMS
AMETEK CERTIFICATION – The document stating the device, either a tester, piston & cylinder, weights, the guaranteed accuracy of the device, the device serial number, certification (not the actual test date), and the recommended recertification date (normally 1 year), the National Bureau of Standards traceability report numbers, and the test conditions. The purchase order number is included so that proof of certification can be directly connected to a specific device and a specific Purchase Order.
CERTIFICATION WITH DATA – This is a second page to the certification. The document reports all of the testers measured particulars, (e.g. effective area, “B” pressure coefficient, etc.) The masses of each weight in the weight set are also reported as well as nominal and actual pressures. The customer can use this information to conduct more accurate tests than simply just working to the accuracy of the tester. With this information the customer can calculate his own actual pressures per the equations on the back of his certification.
CROSSFLOAT – A testing method or procedure which compares a known pressure for the purpose of determining the effective area of the unknown pressure source.
DEADWEIGHT GAUGE – A device used to measure pressure, using a known area and mass (deadweights).
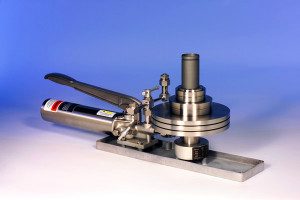
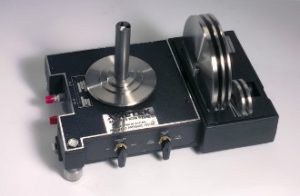
DEADWEIGHT TESTER – A device used to generate or produce a known pressure, using a known area and masses (deadweights).
GAUGE – This term is normally used with reference to pressure requirements.
GAGE – this term is normally used with reference to dimensional requirements, such as a “Go-No Go” Plug Gage.
INSTRUMENT AIR – Air defined by the ISA – S7.3 standard.
NIST REPORT NO. – This number appears on the certification for each tester. Numbers preceded by “P” e.g. P-7800 represent pressure test report numbers assigned by and on file with the
NIST temperature and pressure measurements and standards division center for absolute physical quantities. Numbers such as 212.31/
193712 are NBS numbers used in calibrating the weights used to calibrate AMETEK scales. All of these numbers are part of the traceability reported to the customer.
TEMPERATURE COEFFICIENT – When the piston and cylinder or ball and nozzle heat up or cool, their linear dimension changes, thus affecting the effective area. The temperature coefficients are well documented for the materials AMETEK uses and are reported in case the customer wishes to use his own computations.
TRANSDUCER – A device for converting mechanical stimulation into an electrical signal. It is used to measure quantities like pressure, temperature and force.
ACCURACY
ACCURACY – The closeness or agreement between a measured value and a standard or true value; uncertainty as used herein, is the maximum inaccuracy or error that may reasonably be expected.
PRECISION ERROR – The random error observed in a set of repeated measurements. This error is the result of a large number of small effects, each of which is negligible alone.
TRUE VALUE – The reference value defined by the National Institute of Standards & Technology which is assumed to be the true value of any measured quantity.
UNCERTAINTY (U) – The maximum error reasonably expected for the defined measurement process.
CALIBRATION
CALIBRATION – The process of comparing and correcting the response of an instrument to agree with a standard instrument over the measurement range.
CALIBRATION HIERARCHY – The chain of calibrations which link or trace a measuring Instrument to the National Bureau of Standards.
LABORATORY STANDARD – An instrument which is calibrated periodically at the NIST. The laboratory standard may also be called an interlab standard.
NIST – National Institute of Standards & Technology. The reference or source of the true value for all measurements in the United States of America.
TRACEABILITY – The ability to trace the calibration of a measuring device through chain of calibrations to the NIST.
TRANSFER STANDARD – A laboratory instrument which is used to calibrate working standards and which is periodically calibrated against the laboratory standard.
WORKING STANDARD – An instrument which is calibrated in a laboratory against an interlab or transfer standard and is used as a standard in calibrating measuring instruments.
HYDRAULIC TESTER TERMS
ACTUAL AREA (PISTON) – The area as determined by measuring the piston with a dimensional gage.
CONTROLLED-CLEARANCE PISTON & CYLINDER- This design permits an external pressure to be exerted around the cylinder thus controlling the clearance between the piston and cylinder. While this device is sophisticated and cumbersome to use, it is well documented and is the primary standard used by the NIST.
EFFECTIVE AREA (PISTON & CYLINDER OR BALL & NOZZLE) – The area as determined by a calibration process, such as crossfloating.
NOMINAL AREA (PISTON) – An ideal specific area which is not measured, but is used as a reference.
In the case of AMETEK pistons, nominal areas are as follows: 0.01, 0.05, 0.02, 0.1 square inch.
 “B” PRESSURE COEFFICIENT – This term represents the piston’s non-linearity. As the pressure Ametek Type T Hydraulic Pumpincreases in a hydraulic tester the piston and cylinder experience large stresses which change the effective area. Depending on the piston and cylinder shape the value of “B” can be (+) or (-).
SURFACE TENSION – As fluid leaks up between the piston and cylinder it puts an upward force on the piston, this is a result of the fluid surface tension acting on the circumference of the piston.
SIMPLE PISTON & CYLINDER – A piston and cylinder design which permits pressure to be applied only to the piston. This is represented by hydraulic cylinders used in machinery.
RE-ENTRANT CYLINDER – This design allows the pressure being exerted on the piston to also act on the cylinder. As pressure increases the cylinder is being forced to reduce the fluid leakage between the piston and cylinder. The AMETEK Type T & R series testers and gauges are of this design.
MASS TERMS
AIR BUOYANCY – When considering the load on the piston and cylinder in a deadweight tester, the load has to be reduced by an amount equal to the mass of the air displaced by the weights.
APPARENT MASS – Mass of a weight as referenced to the density of a comparison mass. When weights are weighed on scales, the internal calibration standard of the scale is normally brass or stainless steel. AMETEK uses brass thus all masses are reported as apparent mass against a brass standard.
CALIBRATION GRAVITY – The gravity of the location for which the tester was calibrated. Note, this is not necessarily the same as the gravity of the location in which the tester was calibrated.
GRAVITY – Since dead weight testers rely on known masses to generate known pressures it is necessary to correct the mass of the weight for different gravities. The weights for all dead weight testers are referenced to or calibrated at a specific gravity. When correcting for a change in gravity, it is only necessary to take a ratio of the local gravity to the calibrated gravity and multiply it by the pressure. See the handbook for a further explanation.
LOCAL GRAVITY – The gravity of the area of location in which the tester is being used.
TRUE MASS – Mass of a weight as referenced to its own density.
PNEUMATIC TESTER TERMS
ACTUAL WEIGHT FACTOR – The weight Factor computed by using a pneumatic tester’s effective area, or by an actual calibration at a specific test point.
HI/LO WEIGHT FACTOR – The average weight factor of the highest and lowest actual weight factors determined by calibration at AMETEK. The HI/LO weight factor is also called the average weight factor or the reported weight factor. This value is used to calculate all actual pressures. Reported on the certification with data.
 NOMINAL WEIGHT FACTOR – This term corresponds to the hydraulic nominal area terminology. The nominal weight factor for the pneumatic testers is as follows:
PK : 200.51 grams/PSI
RK: 100.25 grams/PSI
HK: 20.05 grams/PSI
NOTE: The RK is 1/2 the PK and HK is 1/10 the PK so that all the areas are multiples of each other.
WEIGHT FACTOR – A term used by AMETEK to describe the relationship between the ball area and the mass required to generate 1 PSIG. Weight factor is defined as grams/PSI.
PRESSURE TERMS
ACTUAL PRESSURE – The pressure measured by a gauge or generated by a tester.
ABSOLUTE PRESSURE (PSIA) – Pressure measured with reference to zero gauge pressure, or a perfect vacuum. Atmospheric pressure is absolute pressure or about 14.7 Measurement PSIA. 0 PSIA would be a perfect vacuum.
BACKGROUND, LINE, OR STATIC PRESSURE –
The magnitude or pressure in a differential pressure gauge, or transmitter. This pressure could be at 3000 PSIG, but the differential pressure may only be 1 PSID. This means that one side of the device could be 3000 PSIG and the other side at 3001 PSIG.
DIFFERENTIAL PRESSURE (PSID) – The difference between two pressures as measured by a differential pressure gauge.
GAUGE PRESSURE (PSIG or PSI) – Pressure measured with reference to atmospheric pressure. 14.7 PSIA is equal to 0 PSIG.
NOMINAL PRESSURE – An ideal specific pressure used as a reference. Generally this would be the pressure desired by a gauge user. The difference between the nominal pressure and the actual pressure represent the accuracy of that pressure.
VACUUM – A negative gauge pressure, with the maximum (or perfect vacuum) having no atmosphere pressure, i.e. about -14.7 PSIG or 0 PSIA.
Source: Ametek

