Measuring Torque in 3 Facets of the Assembly Process Improves Quality Control & Reduces Rejection Rates
Torque measurement is utilized in three areas of assembly. Controlling torque is essential for companies to ensure their product’s quality, safety and reliability isn’t compromised.
Prior to Assembly
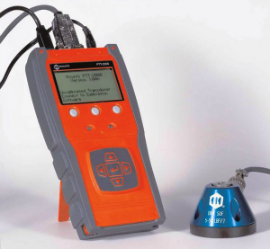
Torque testing equipment, like Torque Analyzers and Torque Sensors are used prior to the assembly process. The equipment is used for tool setup or conducting tool capability studies. For tool setup, the tool crib or lab will want to set the torque tool according the torque specification required for the application. For tool capability studies, technicians need to ensure that the Torque tool can provide the necessary Torque and repeatability that’s required for a potential application.
The equipment used for this torque testing would be:
– Tabletop torque testers with built-in transducers
– Torque Analyzers that connects with either stationary torque sensors or rotary torque sensors
– Joint simulators like run down adapters
During Assembly
For pneumatic and electric assembly tools that are being used in the production area, many manufacturers like to audit the tool and verify the actual torque being applied to the application or if the tool is starting to fall out of specification. The Rotary Torque Sensors is the ideal torque-auditing tool for testing the actual torque being applied on the assembly application. By connecting a rotary torque sensor between an Electric or Pneumatic Tool and an assembly application, you can monitor the torque being applied from the tool to the fastener or bolt. This type of torque reading is called a dynamic torque reading. The rotary sensor is connected to the torque analyzer, which records and stores the data.
Manufactures also use this auditing process to validate the torque setting of the tool and the data collected during a capabilities study are in sync. Since each assembly application has a different joint rate and tolerances, the performance of the tool on the application may differ from the tool crib or lab results. Using a rotary sensor connected to a torque analyzer, technicians can see if there are any differences with the torque readings between the assembly area and the tool crib or lab. Then the technicians can make any necessary adjustments to the tool or the assembly process.
For hand tools like Torque Wrenches and hand Torque Screwdrivers, manufacturers might utilize a Torque Tester on the production floor and require their assemblers to verify the torque setting daily or weekly to ensure the tools aren’t falling out of calibration. The torque tester will display a result that must be compared to the allowable tolerance of the torque tool. Some torque testers offer a tolerance-setting feature that provides a GO/NG result (RED or GREEN) when the torque tool is tested. If the verification result is OK then the torque tool is deemed in tolerance. If it is NG then calibration or adjustment of the torque tool is required.
After Assembly
 As a final check, manufacturers may select to verify the torque after an assembly process, so they can verify adequate Torque was delivered to the fastener and detect any missed or loose fasteners, or joint relaxation.
What is Residual Torque? It is the amount of tension that remains in a joint after fastening a threaded fastener. The best way to determine residual torque is by performing a “just move” test. Mountz offers two best practices solutions for measuring residual torque. The Mountz TorqueMate digital torque wrench will display torque applied after 3 degrees of movement, it will also show the final Torque and angle applied.
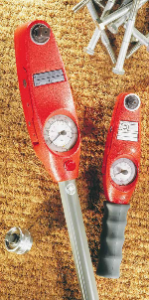
An economical counterpart to the Torque Mate digital Wrench is the Mountz Dial Wrench. The dial wrench captures the finishing torque applied to a fastener with fine main and memory pointers.
The equipment used for conducting testing would be:
– Dial Wrenches and Dial Screwdrivers
– Digital Torque Wrenches
– Wrench or screwdriver sensors mated with a Torque Analyzers
Source by: Mountz
